
Creating a blog using Jekyll and GitHub pages is super easy!
GitHub is really sweet. Using Github Pages you can deploy a blog for free exremely quickly and easily and best of all you do not need to use the command line (unless you want to) or have any previous HTML/CSS/JS experience (having some wont hurt).
Jekyll is a powerful static site generator that can be set up very quickly. It can be leveraged for a number of content management solutions however in this guide I will walk you through setting up a basic blog such as this one.
I will outline instructions for both devs, and those with absolutely no experience, that explain how to get a blog up and running in a matter of minutes.
For those with no web development experience:
To get a blog up and running there are a few simple steps you need to follow:
1.) Create a Github Account
Create a free account on GitHub.
2.) Find a Jekyll theme that you like
If you like what you see you can create a blog using this exact theme which can be found here.
Hundreds of options can be found at jekyllthemes.org/.
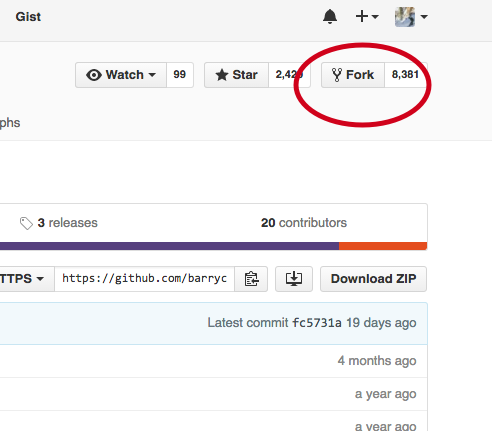
Once you have found a theme you will ‘fork’ a starting point. Click the ‘Fork’ button in the top right corner.
3.) Host on GitHub
Click the ‘settings’ button on your forked repo and change the name to
yourusername.github.io
4.) Visit yourusername.github.io in your favorite browser
At this point if you have followed the steps above, you should see the your blog live. To customize the settings and content of your blog you will edit and update the variables located in _config.yml and then commit said changes.
5.) Create your first blog post!
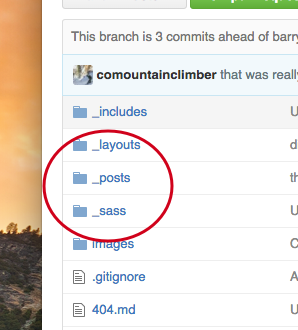
To make edits and create new posts simply open the _posts folder
click 2016-3-25-Hello-World.md to view the example post so that you can get started. Please not that you must replicate the formatting in the title of the .md file (year-month-day-post-name.md)
For Developers:
You will absolutely love working with Jekyll as a CMS. Please not that it is required to have Ruby installed so that you can run the command gem install
1.) Install Jekyll on your machine.
gem install jekyll
2.) Start from scratch OR find a theme you like.
Hundreds of options can be found at
jekyllthemes.org/. If you want to start completely fresh run jekyll new myAwesomeBlog then cd myAwesomeBlog and jekyll serve
This last command will start a local web server and allow you to preview all changes.
3.) Create your first post and customize
Your blogs settings live inside _config.yml Edit these to get started.
Find the folder _posts within your jekyll project and create a new file. Follow the file name formatting of the default post but change it to todays date. Using markdown create new blog posts with ease!
4.) Create a github respository with the name yourusername.github.io
Your project will now be live for the universe to see!
You will now be able to visit your blog at yourusername.github.io in any browser.